I have not
forgotten my blog, nor have I abandoned the task of writing. Real life took
priority however, and I hope everyone understands. Classes are done for this
term and the holidays are over. Happy Holidays everyone, I
truly hope you had a great time with family and friends!
With the economy in turmoil, there
is no better feeling than having well-stocked shelves. This includes having dry goods as well as the
extensive collection of canned things I have managed to squirrel away over the
past couple of years. Especially with
this time of year, with people dropping by at random times, the pantry has saved
me a countless number of panicked store trips I would have otherwise had to
make. Dry goods are part of the items I
stock, and never fear if you’re intimidated by the idea of canning, this is
easy to do.
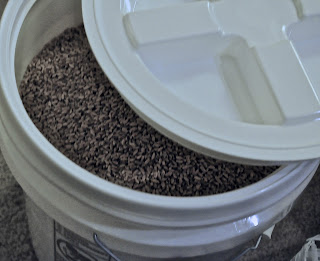
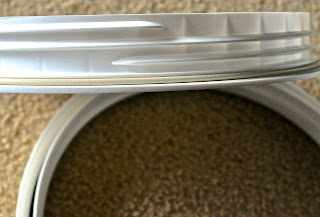
Gamma lids are wonderfully useful things!
All of my dry goods: wheat berries,
rice, beans, dry milk, salt, and sugar are kept in 5 gallon buckets with gamma
lids and oxygen absorbers. I will admit that there is a ratio for oxygen
absorbers that I have not yet mastered, but there is plenty of information about
it online so you can determine how many of which size you’ll need to do the
job.
I have also considered using mylar
bags which can be sealed with a food saver, but have not had a problem without
using them to this point. I do use my stock however, and do not intend to stock
anything for years on end without replenishing what I have used, so I don’t see
the need for the added layer of the mylar bag.
These bags seem to be a great idea if you are concerned about humidity,
bugs, or rodents (since they don’t like the metallic layer), or simply want to
have smaller quantities of dry goods open at a time than having the whole 5
gallon bucket available at one time. You could package sugar, for example, in
mylar bags weighed out in 1 or 2 pound increments and packed into a single
bucket with a gamma lid. When you needed sugar, you would simply open the gamma
lid, and remove a single mylar bag for immediate use.
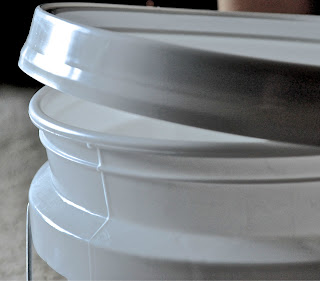
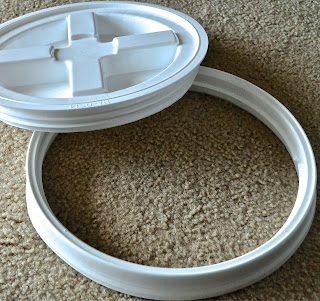
So what is a gamma lid? These are
prepper necessities in my opinion. They are 2 piece lids, which include an
outer ring that are pounded onto the rim of a 5 or 6 gallon bucket, and an
inner lid portion which screws into the ring. Both portions have their own
O-rings, and form very tight seals for the contents of the buckets. The
buckets, once filled and labeled, are also stackable with the gamma lids on, so
space saving is optimized. Please do not forget to label the contents of the
bucket and adding the date the bucket is packed is also a good idea if the
contents are not going to be used within a year or so. Imagine the frustration
of having to check every stored bucket for the correct type of beans if you
forgot to label!
Preparing the food for storage also
takes a little work. Yes, I am sorry to say that even storing food in a large
bucket still has at least a little prep work involved. After you purchase your
dry food for bucket storage (beans, rice, wheat, dry corn, etc..) place the
entire bag it came packaged in from the store into the freezer. The freezing
process will kill any bug larva that probably is on the food. During long-term
storage, if you skip the freezing step, you can expect to open your stored food
only to find the contents infested with bugs. I am sure some may argue that
these pests are edible so it doesn’t really matter, but I would rather have
protein from sources that are large enough to shoot with a .22 at a minimum!
How long to keep the package in the freezer depends on how big the package is.
A small bag of beans can probably be left for 3 or 4 days, whereas a 25 pound
sack of wheat berries I usually leave frozen for a week.
When you remove the food from the
freezer, leave it out until it reaches room temperature and is dry. The LAST
thing you want is to waste good money on preps only to have it mold in the
bucket because of condensation. If you only have room for a bowl full or wheat
in your freezer at a time (and I have done this, so I can sympathize) then
cover the bowl with plastic wrap before putting it into the freezer. When you
remove it, just leave the plastic in place without disturbing your preps too
much. I about a day the condensation will be gone and you will be ready to pack
your food into a bucket.
Wash both parts of the gamma lid,
and the bucket itself and be sure all of the parts are dry before adding
ANYTHING to it! I usually wash my container parts when I put the food into the
freezer since this allows plenty of time to air dry and get the gamma lid onto
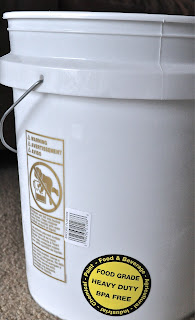
the bucket. I keep mentioning the buckets and have yet to explain what kind of
plastic you need and where to find them. You want food grade plastic, I choose
white to match my décor and also since the dyes in colored plastic are chemicals,
so who knows if they will “off-gas” into my food – yuck! My buckets come from
the local big-box hardware store and usually run $3.50 per bucket. Look for
ones that are fairly clean and damage free, and that’s really all there is to
it. Gamma lids take a bit more searching. Here in the US, Sams Club sells them
online for $77 for 12 lids. Amazon and Ebay also have them, as well as any
prepper store worth their salt.
Once all the parts are clean and
dry, use a rubber mallet and bang the outer ring onto the edge of the bucket.
This can be harder than is sounds, but be careful you don’t get frustrated and
to violent with the mallet since you can crack the bucket or the outer ring.
Once the ring is firmly on the bucket, it should be level on all of the edges.
Pour your previously frozen, and now room temperature, and condensation free
food into the bucket. Wipe the screw threads of the outer ring with your hand,
or gently blow off any debris, and screw on the inner lid portion. Label the
bucket, stack however you desire, and you’re done. Food should never be stored
outside, and should be climate controlled if at all possible.
Thanks for reading, and Happy
Prepping! Happy New Year as well!!!


